Tuesday, November 18, 2014

Brigitte

The newest pattern in the LilyGiggle collection released today!


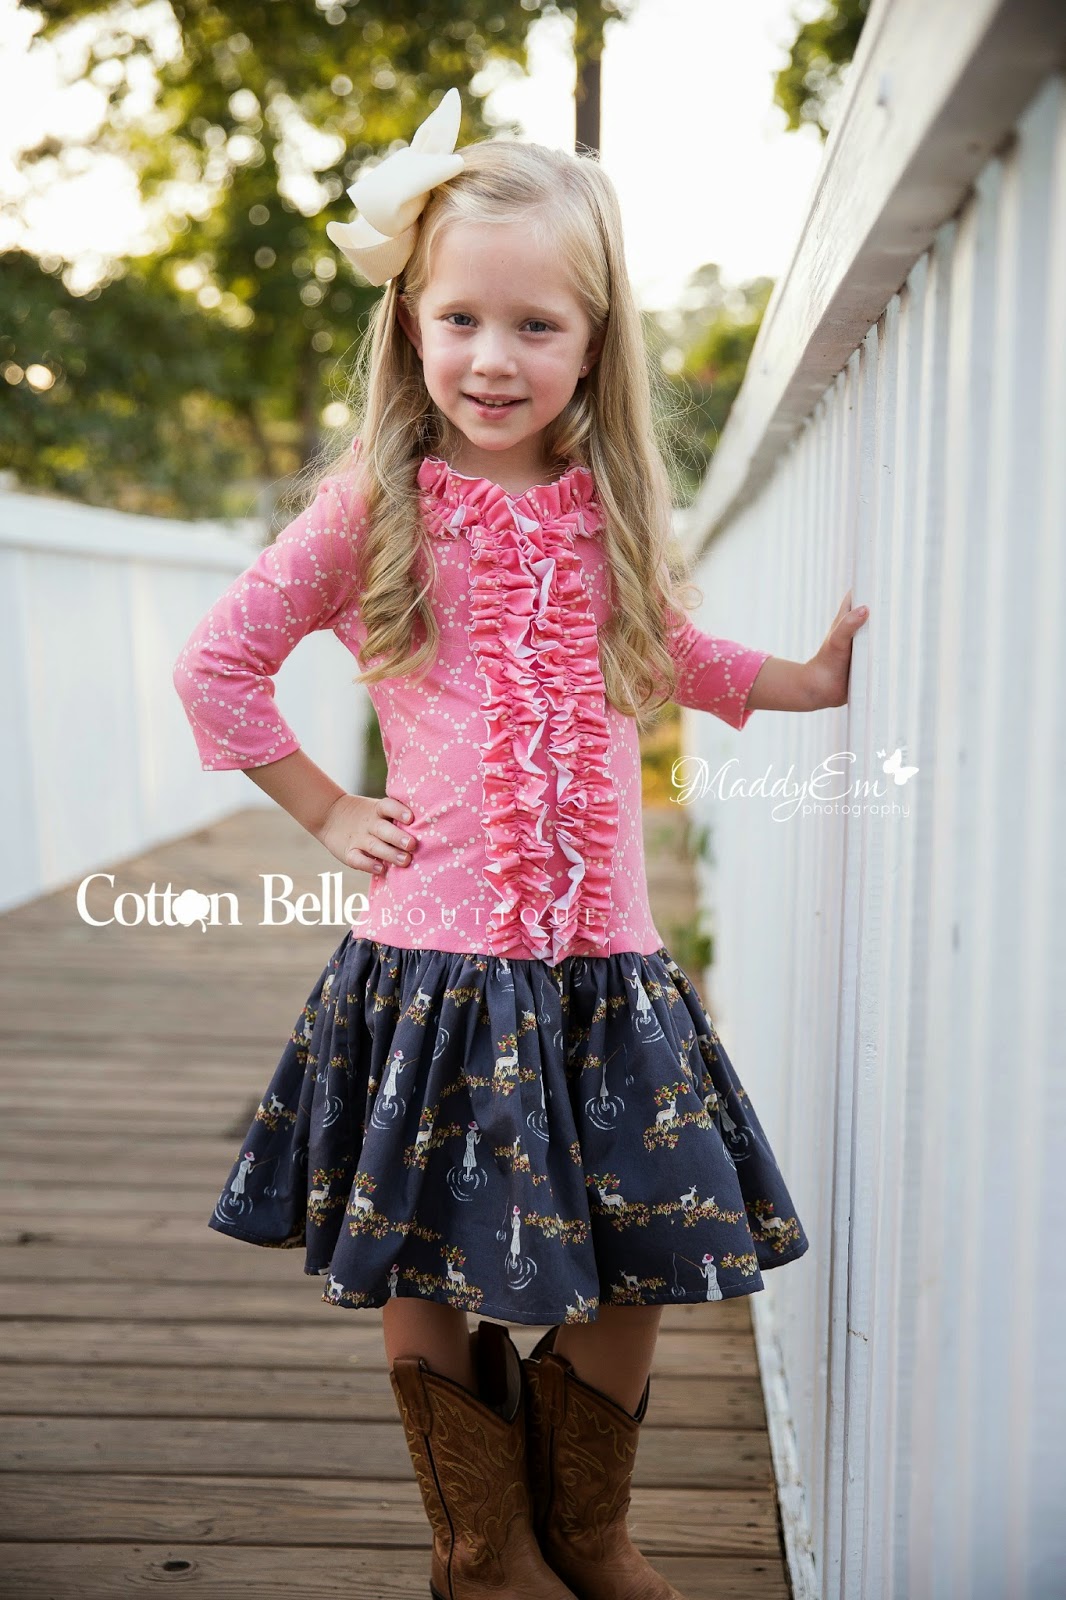
The dress option for this pattern features a knit bodice with a darling bow accent at the neck and a woven hi-lo gathered skirt. There are three sleeve options to choose from- short, 3/4 length, and long sleeve to make this dress perfect for any season. Sizing for this pattern is 2-12.

The hi-low skirt is subtle, yet adds a twist unlike any other dress pattern from LilyGiggle. 


I added some extra details to mine with the addition of a band around the bottom and some 
cluney lace trim.

This beautiful fabric is from the Indelible line by Art Gallery Fabrics.  If you read my blog much, you know I have a love affair with Art Gallery. :) 

 The second option from this pattern is the peplum top. I haven't had the chance to make this, but my sweet friends Alexis from My Sweet Sunhine, and Natalie from The Sassy Pumpkin both did a great job with it! Alexis made the size 7 peplum top from some more beautiful fabric from 
Art Gallery Fabrics.


I choose to do my bow in the same color as my bodice since my skirt had a lot going on, but I love the accent of the bow here in this photo. So many options and ideas!! 

Natalie made a size 2 peplum top for her sweet girl in this beautiful fabric from--- you guessed it-- Art Gallery Fabrics! We all have an addiction. Please send help. Or money to buy more fabric. ;) 


Natalie paired her top with one of the patterns from the earlier days of LilyGiggle- The Beehive Bloomers. Aren't they such a cute pair together?


I hope these beautiful photos have convinced you that you really need this pattern. Great dress and super cute top to pair over-- well, anything! We even had one tester put it over a gathered skirt and it was SO adorable!  You can find more cute tester photos in the
  LilyGiggle Pattern Group on facebook. 

I saved the best new for last. This pattern is on sale right now for only $7! A dress AND a top pattern for one low, great price! Run and get your copy before the sale is over! :) 


Tuesday, October 14, 2014

Fiddlehead Flutter Top

Do you know what at Fiddlehead is?  I had never heard of it until this pattern testing. Apparently Beth is much more rounded in her horticulture life than I am because I had to google it. Go ahead, I won't look. You can goggle it too. :) 

Today a Fiddlehead is going to be a pattern! Introducing the new Fiddlehead Flutter top from LilyGiggle.

.

Do you see that gorgeous lettuce edge on the flutter? Now you know where Fiddlehead came from! I have to tell you I was a little nervous about that lettuce edging.  I made three of these tops for testing. The first one did well, but by the time I got to this third one I was very pleased with the results. Don't be intimidated by a new technique! This one is super easy to learn and there are great instructions in the pattern. 


I have a bernina sewing machine that I used to do this lettuce edging.  You can also use a serger if you prefer, but I think the sewing machine does it best. 


Since fall is finally in the air here in Georgia, I made my top long sleeve for the cool weather that is hopefully coming soon. This pattern also includes a sleeveless version as well as a 3/4 length. Perfect for every season! 


Leggings seemed to be a great pair with this top so I used the Petunia Petal Pants (lengthened a tad and minus the petals) for my boot-loving girl.  

Now for the good part----  This pattern is releasing on Friday!!!!! If you aren't already a member of the LilyGiggle sewing group, join here so you don't miss it! 

And last, but certainly not least, the fabric. I know you are dying to know where this fabric came from. I'm always on the hunt for great knit, especially if it's printed. Art Gallery Fabrics apparently got the memo that the seamstresses need some beautiful printed knits and they have been killing it lately! For the Fiddlehead top I used Tree Fleur Knit in Blanc. This knit is the perfect weight for lettuce edge, and it's so soft!  My leggings are made from Les Points Knit in Rose. Both fabrics are from the Cherie line by the very talented Frances Newcombe. Gorgeous aren't they?  


To win a copy of the Fiddlehead Flutter top pattern enter here until Friday at 12am EST:


Winner will be announced Friday morning!

Friday, September 26, 2014

LilyGiggle Jujube Sew Along- Day 5

Anyone else excited that it is Friday? :)

Today is our final day and we are going to attach our skirts. Before we start sewing, you need to stabilize the bottom of your bodice. If you look on page 22 of your pattern, step #21, you will see clear directions for this process. I personally love knit interfacing. I cut a strip 1 inch x the width of my bodice. Make sure the stretch in your interfacing is going the right direction before you iron it on! (This girl I know *ahem* did her's wrong one time and had to rip it all off and start over.)  Now that your bodice hem is stabilized, lets talk about the skirt.

Today I'm going to show you a double tiered skirt. I saw a dress on pinterest with a skirt like this and I sent a screen shot to Beth and told her we had to do this for the sew along.  The pattern calls for the skirt to be 2 SW pieces. Because we are doing two tiers, I went with only 1 SW per fabric. If you are using voile or a very lightweight fabric, you might be able to still do the 2 SW pieces. I was worried that with this regular cotton fabric it would be too heavy for the knit bodice and possibly pull some.

Cut your bottom tier as according to the length directions on the pattern, but only cut 1 piece instead of 2. For my size 4, that was 10.5 x the width of the fabric. Then take your other fabric, (this will be your top tier) and cut it half the length of your first piece. My first one was 10.5 so I cut this one 5.25.


 Now hem the bottom of each piece and run a gathering stitch across the top.


Gather your top tier and pin right sides together to your bodice. 


Sew the top layer on. Be very careful not to pull the fabric as you sew. Repeat with the bottom tier. Finish seams with your serger.  Top stitching is optional.


YOU ARE DONE!!!!!  WOOHOO!! 

Thanks for participating in the first ever Lilygiggle Sew Along! When your dress is completed, please load your photo into the Jujube Sew Along Album on our LilyGiggle group. Voting will begin Sunday and run through Tuesday. Winners will be announced Tuesday night.

Thursday, September 25, 2014

LilyGiggle Jujube Sew Along Day 4

I just have to say how much I'm loving all the photos of the things you are all creating this week.  I love to see all the different creative styles.  

Today we are going to talk about sleeves. The Jujube pattern comes with three sleeve lengths- short, 3/4, and long sleeve. I know some of you already have your sleeve length chosen and even cut, so feel free to proceed as planned.  If you are undecided, here is a variation you might want to try out.

First we are going to start with the flutter pattern piece from the Secret Garden dress. My dress was a size 5 so I used the flutter that was for the size 2-6. We need this to be just a bit fuller than it is for the Secret Garden dress so I placed my pattern piece 2 inches from the fold and then cut.


Here is what you should have now. 


This next step you can do two different ways. You can use your serger or your sewing machine to do a lettuce edge along the curved side of your flutter. I did mine on my regular machine. I set my stitch width to a 4 which is the widest it will go, and my length to 1/2. (I have a Bernina if that helps any.) As I sewed along the edge, I stretched the fabric and it makes a beautiful "ripple" for a
 great lettuce edge. 


Now take your flutter to your machine and run a basting/gathering stitch along the straight edge.  Gather it to fit your arm whole opening and pin in place. 


Now, if you would like to just have the flutter you can stop here. Serge your edge and then sew your side seams up and you are ready to move on to the skirt.  


Super cute!!  BUT......you can also add a sleeve! 
Pin your sleeve on right over the flutter.


Sew in place. 


And there you have a sleeve AND a flutter! :) 

Sew your side seam up and hem your sleeve and you are all ready to put your skirt on tomorrow!

Wednesday, September 24, 2014

LilyGiggle Jujube Dress Sew Along- DAY 3

I've seen a lot of great looking necklines on the LG group, thanks to our post from Kristi yesterday. I hope you all learned some helpful techniques! 

Today we are visiting another one of the LilyGiggle testers, Kim Wilmes. I'm guessing some of you probably know her from other testing groups, as she does quite a bit of pattern testing.  We fell in love with her twist on the Jujube Dress and thought you might want to try it too.

If you have read through your pattern, you see that today we will be using Wonder Tape. I had never used this product prior to the Jujube dress, and I actually made my first one without it.  Let me give you a tiny piece of advice. If you don't have it, pack up the kids and run to the fabric store and by it! It's worth the trip. I promise. My first jujube had approximately 9,000 pins in the ruffle and took about 20 mins to get it all pinned perfectly! With Wonder Tape you can cut that down to about 2 mins and NO pins. Go get some. For real. 

Who's ready for ruffles???!!  :)


THANK YOU KIM!!!

Tuesday, September 23, 2014

LilyGiggle Jujube Dress Sew Along- DAY 2

Good Morning girls! I've enjoyed scrolling through the sewing group page this morning and looking at all of your fabric selections for your dress.  I see some of you are very ambitious and are making several!  I'm excited to see all your finished products. 

I have a few small changes from my blog post yesterday.  Our grand prize winner is going to actually be chosen by Random.org.  I'm afraid this competition is going to be intense with all the gorgeous photos I've already seen and I want this to be fair, so we will let the grand prize be a random winner. The other two winners will be selected by our host/admin team and then a final one by "fan favorite". 

Our other slight change is that today we AREN'T doing the sleeves. I had that wrong on my notes so that will actually be on Thursday. :)  

Today I have the pleasure of introducing Kristi Elston to you.  She is a talented seamstress and designer. She has been a tester with us for a while and does great blogging.  I hope you enjoy Kristi's blog today and learn some great tips! Thank you Kristi for hosting today!!


Monday, September 22, 2014

LilyGiggle Jujube Dress Sew Along- DAY 1

Today is the first day of LilyGiggle's first ever sew along! I hope you are excited to sew along with us this week as we learn some new tricks and encourage and inspire each other from our sewing rooms all across the world. 

At the end of the week we will be having a fun contest for you to show off what you made. Three winners will be chosen. The SAL hosts, plus Beth and our LG admins, will choose their favorite to be the grand prize winner of 4 yards of fabric from the sweet lady at PurpleSeamstress and 2 patterns of your choice from LG. Two more contestants will be chosen- one via Random.org and the other as the Fan Favorite (you get to vote!)- and each will win 2 patterns of their choice from LilyGiggle.

The pattern we are using this week is the Jujube Dress


This pattern has quite a bit of versatility, and you will see that even more this week.  I hope you find some fun new ways to make this dress that you may not have thought of before. 

For today we will start very simple. 

First you need to print and tape your pattern together. If you haven't purchased your pattern yet, you can buy it here.  Be sure to use code "sewjujube" for 30% off! Don't forget about the cool layering options for printing that Beth has added now.  You will find the details on page 4 of your pattern. 

Our next step is to prep your fabric.  Your knit REALLY needs to be prewashed and dried. Knit sometimes does a significant amount of shrinking in the wash so it's always best to prewash it.

Now for the cutting--- For today I would suggest that you only cut the front and back bodice. Tomorrow there will be some sleeve options discussed, so you may want to wait to decide on your sleeves until after you see the featured looks.  

Now wasn't that easy? Day 1- check! 

See you tomorrow!